Most devices ship with Meshtastic firmware. Switching to MeshCore (or
updating either when a new release arrives) takes about 3 minutes in a
browser flasher page using WebUSB/Web Serial — no drivers, no command
line, and it's completely reversible.
IMPORTANT: Attach Antenna Before Power!
Always connect an antenna to your device before plugging in USB or
turning it on. Even a few seconds of transmission without an antenna can
permanently damage the LoRa radio chip.
Before you start
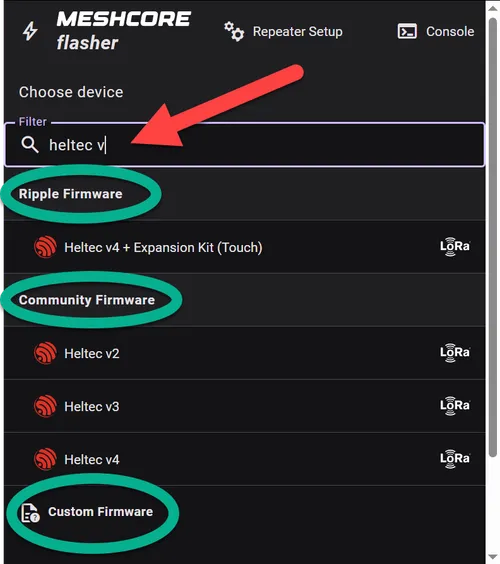
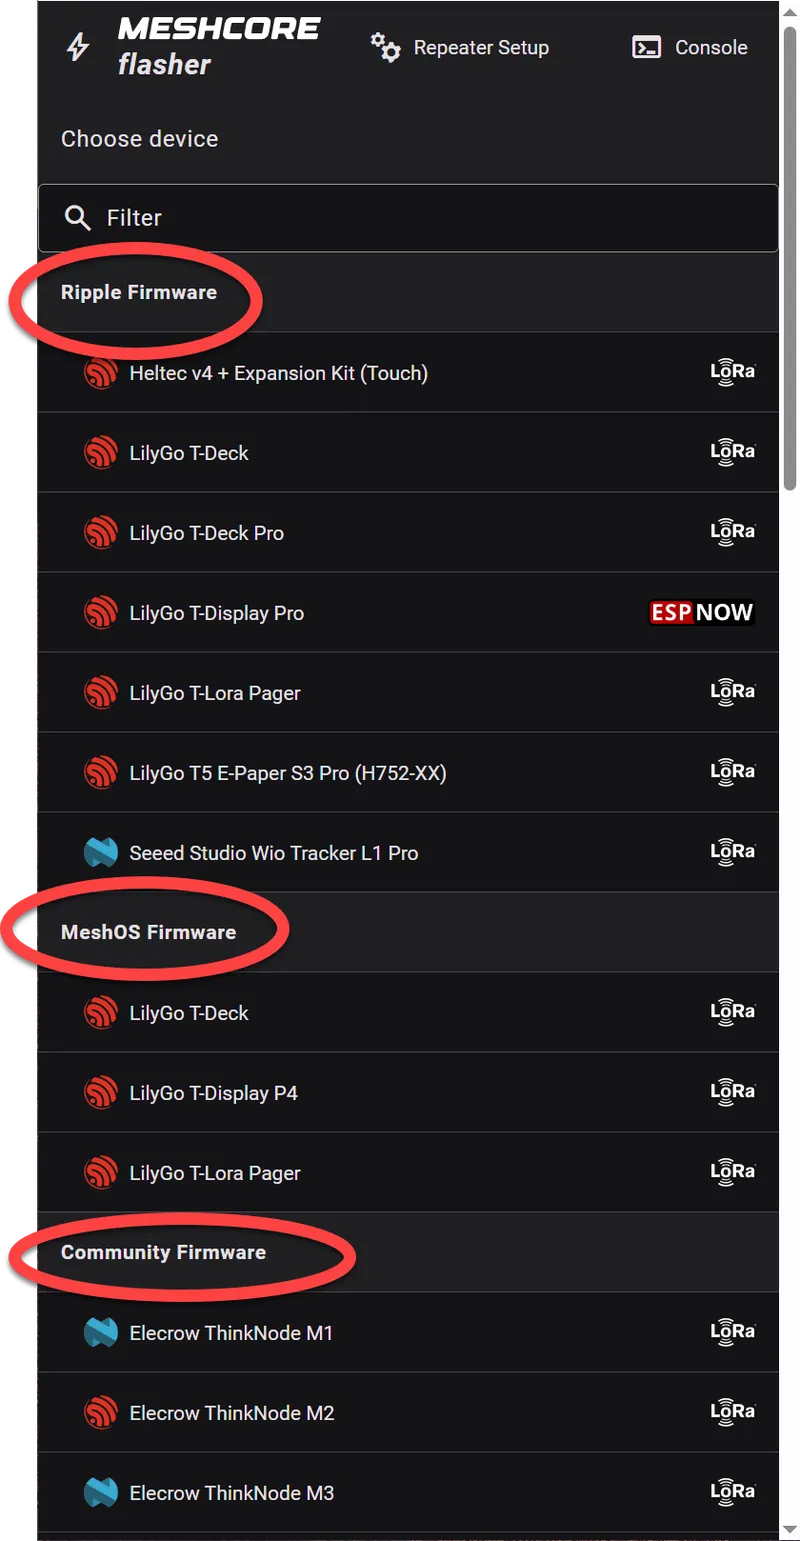
The MeshCore Flasher screen shows several firmware variants that
can be installed. One device may support multiple MeshCore interfaces.
A laptop or desktop computer — flashing requires the Web
Serial API, which is only available on desktop Chrome/Edge. Smartphones and
tablets cannot run the flasher, regardless of browser.
Google Chrome or Microsoft Edge — the Web Serial API used
by the flasher is not supported in Firefox, Safari, or mobile browsers.
A data-capable USB cable — many cheap cables are power-only.
If nothing shows up in step F below, try a different cable.
Your device — make sure it's charged or plugged in so it
doesn't die mid-flash.
Flashing step by step
Note: Your radio doesn't even need to be plugged into a USB port until step
F, so feel free to explore the initial steps before committing to anything!
Open flasher.meshcore.dev in Chrome or Edge browser. Firefox, Safari, and smartphones are not supported for flashing.
Repeater Setup & Console are advanced options. Just note under each type of Firmware, there are lots of devices. A device may be listed under multiple firmware types.
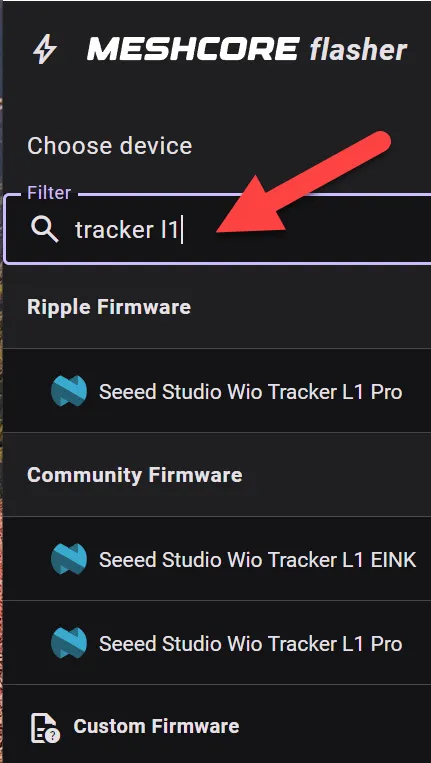
Type part of your device name in the filter field to hide unrelated devices and find yours quickly.
Filtering by device name clears out the clutter instantly.
Now decide which firmware interface you want. This changes the user interface your device will use.
Not sure? Unless you have an all-in-one radio, choose Community first. It is the most common path for new users. Over time, experiment with each of them!
Firmware
Best for
User interface path
Community
Companion radio with flexible connection options. Most popular choice.
Smartphone app - or laptop's browser
MeshOS
All-in-one devices with built-in screen and keyboard. Lilygo proprietary software.
On-device screen
Ripple
All-in-one devices, alternative to MeshOS. Also closed source.
On-device screen
Custom
Advanced users loading their own firmware builds and features.
Implementation dependent
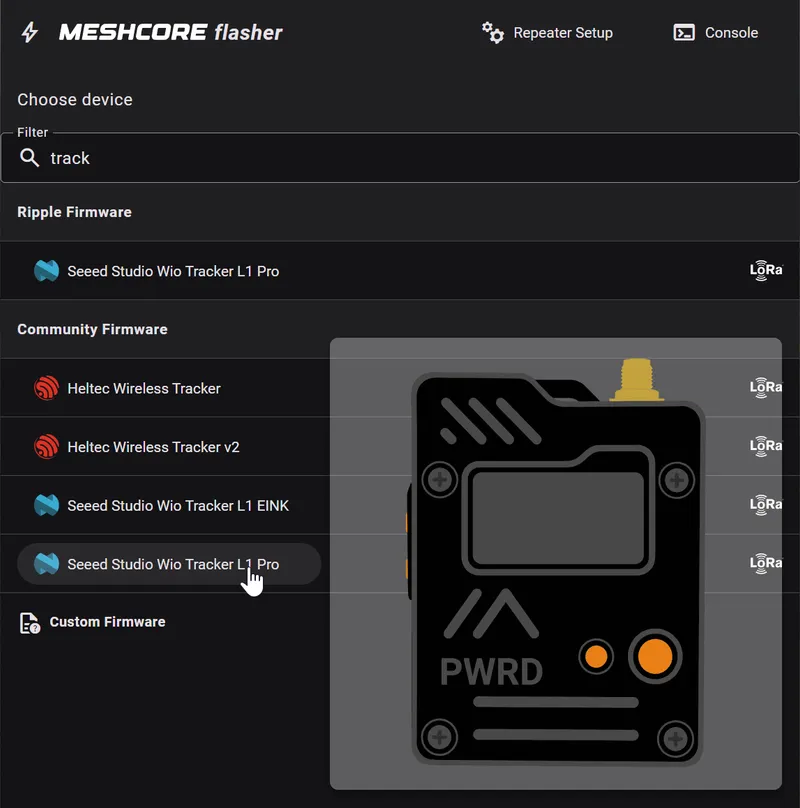
Hovering over a device name should display an image of the device you can use to confirm things look right. When ready, select/click on your radio model underneath your desired firmware.
This affects features and how you enter & send messages: phone app, browser, or on-device UI.
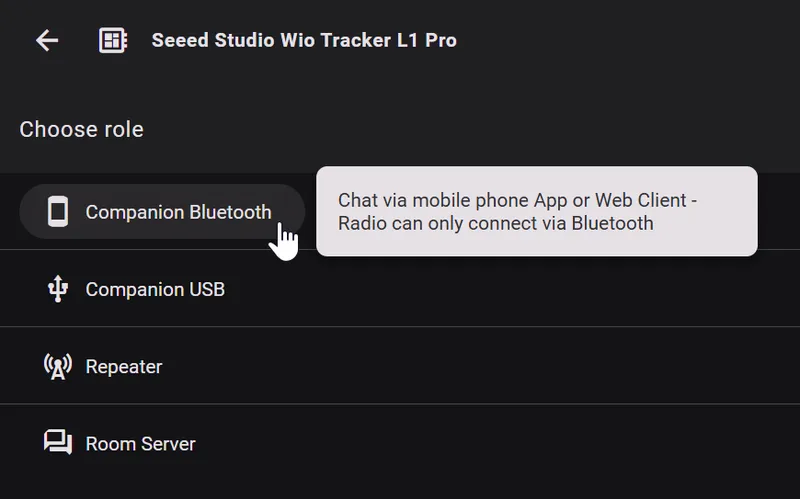
Once you've clicked on your device, select what role it will play on the mesh! You can try different roles in the future, but start with Companion and Bluetooth, if available.
Role
What it does
Who should pick it
Companion
Personal radio paired to a phone/browser or used directly on-device.
Typical users
Repeater
Fixed infrastructure node that relays mesh traffic for coverage.
Advanced users on their 2nd or 3rd device, extending their range
Room Server
Headless bulletin-board style node for shared posts/messages.
Advanced users setting up shared local message hubs
When picking "Companion" you also select the connection method:
Connection method
Best for
How to use
BLE (Bluetooth)
Everyday carry. Phone app pairs wirelessly. Most popular.
Phone app (iOS/Android) or laptop
USB (Serial)
Tethered to a computer. Web browser or desktop app. No Bluetooth required.
Browser or desktop app (USB cable)
WiFi
ESP32 devices only. Radio broadcasts a WiFi access point; connect from a browser.
Browser (WiFi, no cable)
Quick default for first-time users: Community + Companion + Bluetooth (BLE).
For your first radio, choose Companion, then Bluetooth (BLE) if available.
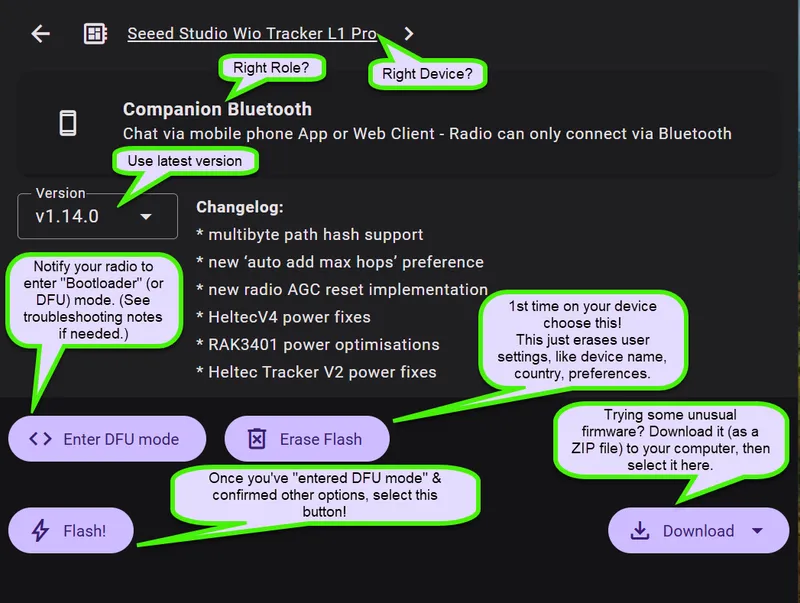
You'll see three action buttons: Erase Flash, Enter DFU Mode, and Flash. You'll use them in that order. Each one opens the same browser serial-port picker to connect to your radio.
Your radio doesn't need to be plugged in yet — feel free to click around and explore first.
Three buttons, used in order. The next steps walk through each one.
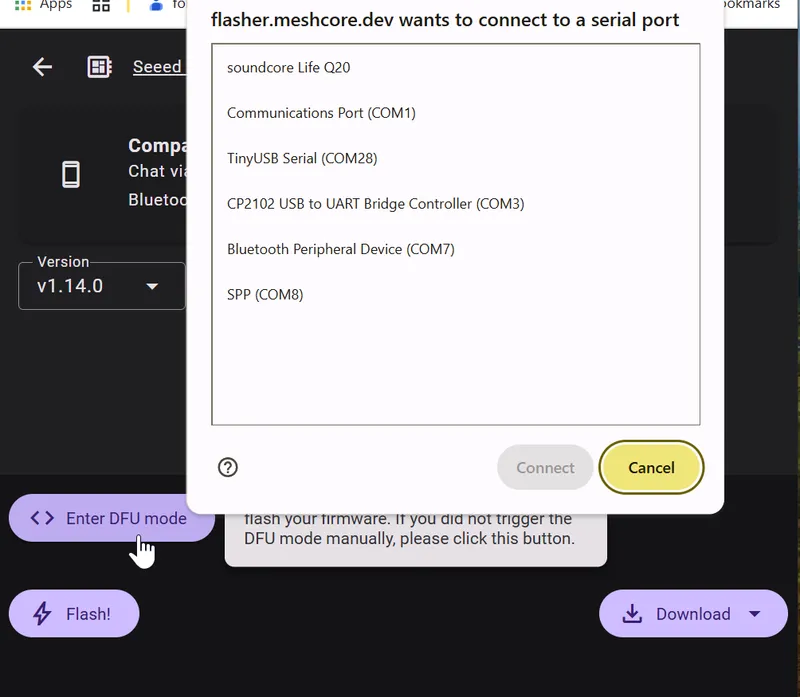
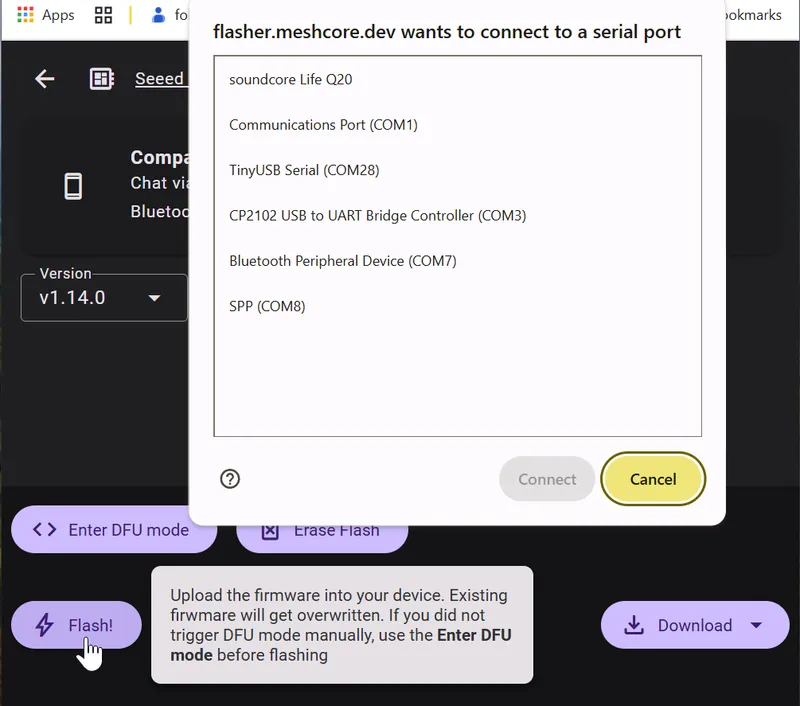
Plug in your USB cable now. Each button opens a browser dialog asking you to pick a serial (USB) port — this is how the browser connects to your radio.
Not sure which port is yours? Unplug the cable while the dialog is open, then plug it back in - repeat as needed. The newly appeared port is your device. Select it and click Connect.
Warning: Let the browser finish an operation before unplugging the cable! Also each action may change the port number — make sure to select the correct port each time.
Unplug and re-plug to identify your radio's port in the list.
Click Enter DFU Mode and select the same port. This tells your radio to stand by for new firmware or erasing.
If it fails or times out, see Troubleshooting below for manual button sequences.
Puts your radio in bootloader mode, ready to receive firmware.
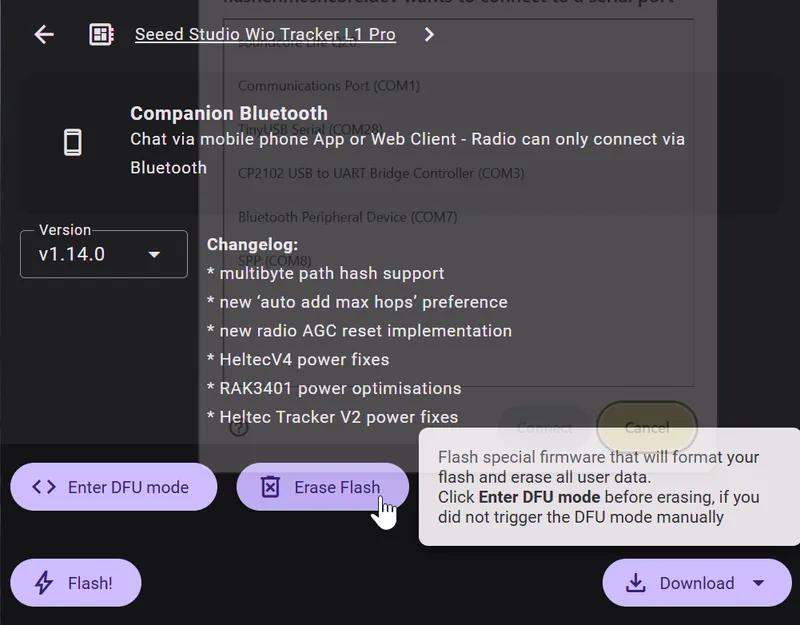
Click Enter DFU mode, select your port if you hadn't already, and then Erase Flash and re-select your port. This clears the old firmware AND old settings, giving you a clean slate — takes about 5 seconds.
On future re-flashes you can skip this if you want to keep your existing settings — like radio name and region.
Only needed the first time — wipes old firmware for a clean start.
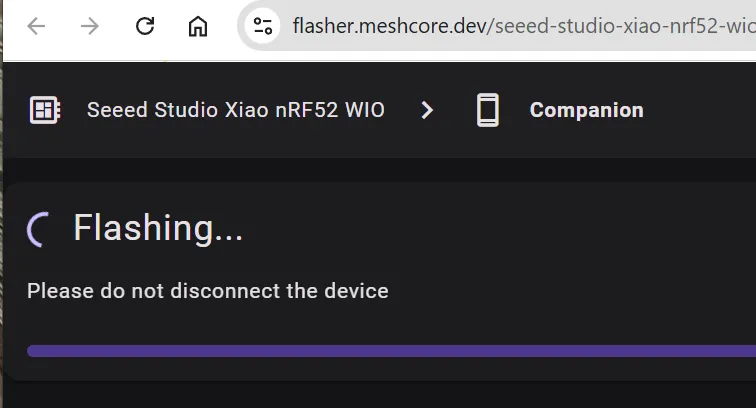
Click Flash, select the same port, and click Connect. The progress may take a minute or two. If it fails, confirm the current port number & retry.
Don't unplug or close the tab while it's running — interrupting mid-write can brick the device.
Takes a minute or two. Don't unplug.
The device reboots automatically when done. You may see a startup logo or QR code on the screen.
Try a different USB cable (most common cause — many cables are
charge-only)
Plugging the USB cable into a different USB port on your computer may
help
On Windows: right-click 'My Computer' → select 'Manage' → go to
'Device Manager' → 'Ports (COM & LPT)' — you should see a new COM
port (dis-)appear when the device is plugged in or removed. If you
don't see any change, that's a sign the cable or port may be the
issue.
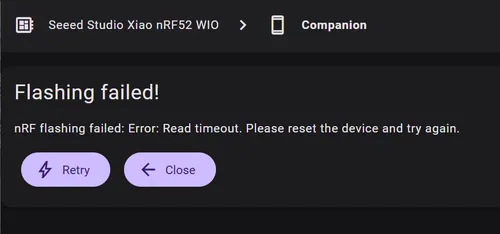
Flash fails partway through
Try again — the flasher is reliable but occasionally needs a second
attempt
Erase first if you haven't already
Close and reopen the browser tab, unplug & re-plug the USB cord &
power cycle your radio to start fresh
If the flasher asks for MCU mode
See Bootloader — Glossary for
the exact button sequences for ESP32 and nRF52840 devices.
This is a fallback path. Start with the web flasher flow first, and
only use manual button combos when auto-detection fails.
Check the community docs for your specific device model
The
PugetMesh Discord is a great place to ask — someone has almost certainly flashed the same
device
Web flasher vs. UF2 drag-and-drop (nRF52840 devices)
Start with the web flasher page first. It is the simplest experience for
most people. UF2 drag-and-drop is a useful fallback when needed:
Web flasher (flasher.meshcore.dev): usually just plug in, select your device/firmware, choose the USB
target in the browser prompt, and flash. If detection fails, then
enter bootloader mode.
UF2 drag-and-drop (nRF52840 only): double-tap RESET — the
device mounts as a USB drive. Download the .uf2 file from the
flasher page and drag it onto that drive. The device reboots automatically
when done.
↩ Switching back to Meshtastic
It's just as easy — open
flasher.meshtastic.org
and follow the same steps. Nothing is permanently changed.
✅ Device flashed? Next up:
Head to
Step 3: First-Time Setup
— connect the app, set your region, and give your radio a name.